
Formatting Your Manuscript for Your Editor

As editors, we understand you’re not a formatter, and we don’t expect you to be! You editor shouldn’t require you to format your manuscript as if it’s going to print, but there are a couple things you can do to get your manuscript ready for your editor.
Don’t worry about being perfect! We don’t expect that. But we’ll be grateful if you’ve done a a few formatting basics to get your manuscript ready for us.
So here are five ways you can make formatting easier on your editor and possibly change your own life!
1. Use an easy-to-read font like Calibri, Arial, or Times New Roman.
It can be useful to fast draft in a font you wouldn’t normally want to read (like Comic Sans) because it stops you from going back to self-edit when you need to get your word count up. . Just don’t forget to change it to an easy-to-read font before you send it off to a reader.
See the difference in readability between the screenshots below? They’re the same text, but one on the left is in Comic Sans and the other is in Times New Roman.


It’s a simple change, but it makes for a streamlined reading experience when your reader doesn’t have to do it themselves!
2. Space your lines to 1.5 or 2.0.
Changing your line spacing to double spaced or one-and-a-half spaced makes your work easier to read. You can change the spacing in Word’s Home toolbar.
Click on the icon with the arrows pointing up and down next to some lines (just to the right of the justification options) and click on 1.5 or 2.0 when the dropdown menu opens.
See below for a visual guide.

3. Remove any extra spaces or paragraph breaks.
There once was a time and a place for double spaces after periods (that was for typewriters), but the industry standard is now single spaced sentences. Even if you don’t double space your sentences, it’s easy to accidentally hit the space bar twice, so it’s good practice to do a search and replace for double spaces anyway.
It’s also easy to hit the enter key to add white space to your manuscript or to get to the next page. The problem is that when you add or remove parts of your manuscript, everything will be wonky. Instead, use page breaks to jump to the next page. (I’ll explain how in the next section.)
To check to see if you have extra spaces or paragraph breaks, use the paragraph mark button to show non-printing marks. (Those include spaces, paragraph breaks, tabs, etc.)

To quickly remove double spaces and enter strokes, you can use Word’s Find and Replace tool. On a Mac, it’s on the right side of the blue bar, just above the Home toolbar. Click on the magnifying glass icon to open the search bar.

When the search bar opens, click on the magnifying glass at the left of the search bar to open a dropdown menu. Then, click replace.


From here, a side bar will open on the left side of your screen, and you’ll see there’s a text box for the words you’d like to find and one for what you’d like to replace that text with. Below that is a list of all instances of the text you’ve searched for.
See the screenshot below to see what that looks like.

To search for spaces, all you have to do is type a space into the search bar! Paragraph breaks are a bit trickier because they comprise two characters: ^p. As you can see in the screenshot, I typed ^p^p to find places where I’d double tapped the enter key and replaced it with a single ^p.
If you’ve used the enter key to get yourself to a new page, you might need to run the search and replace a couple times to remove every extra paragraph break.
4. Use page breaks.
If I’ve asked you to get rid of extra paragraph breaks, how will you be able to start a new chapter on a new page? Don’t worry! I’ve got you.
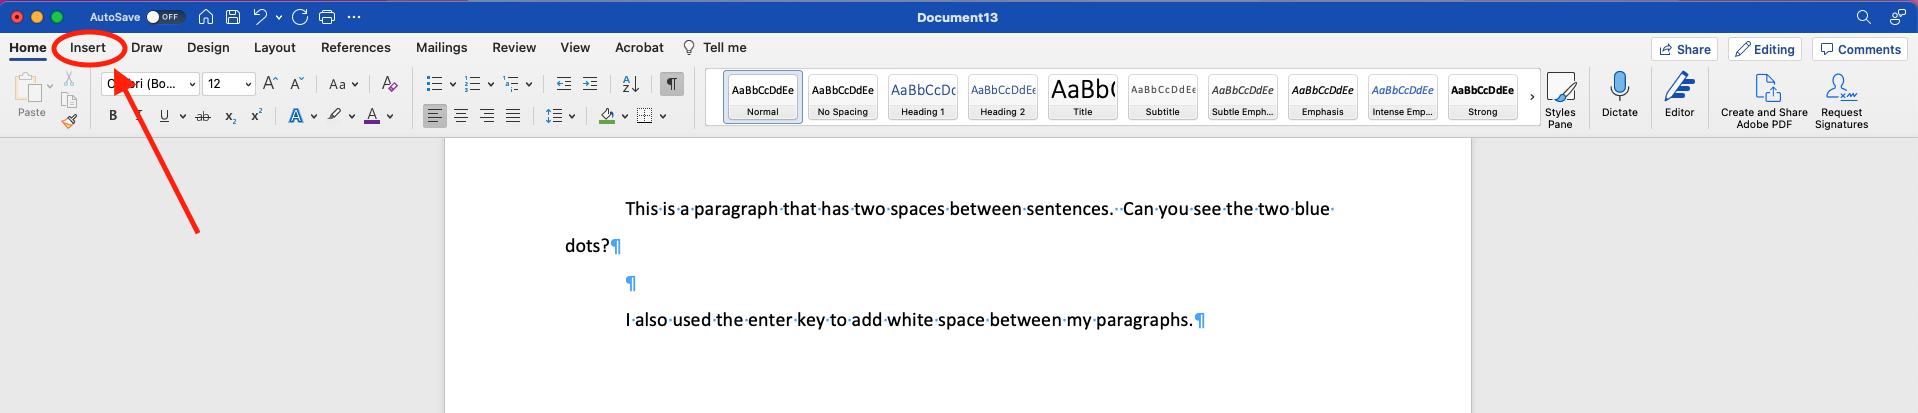
All you have to do is use page breaks! To do that, click on the open the Insert toolbar. (It should be right next to the Home one. See below.
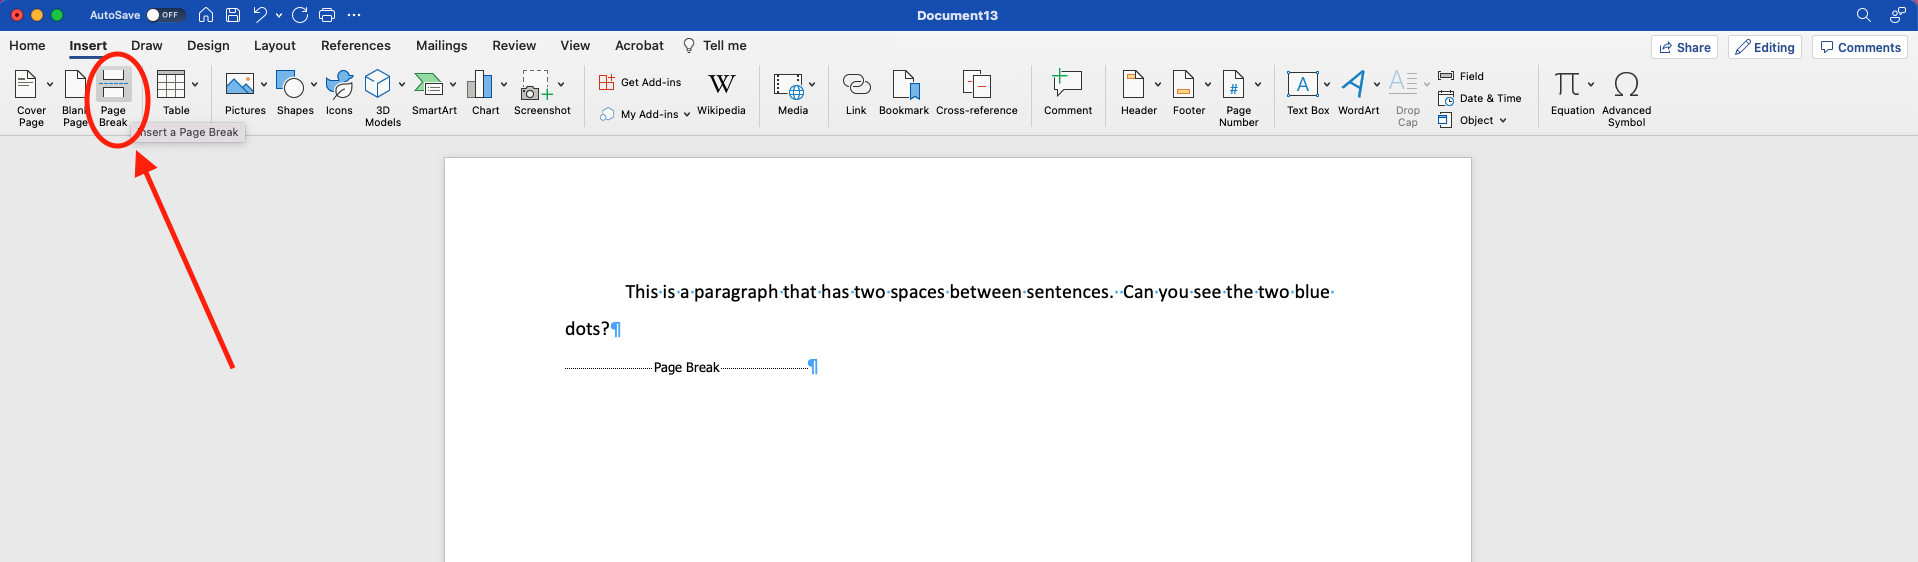
Then, click on the button that says Page Break. It should be just underneath and to the right of the toolbar title.
5. Use the paragraph styling tool to insert indents.
Indenting your paragraphs is also important. Be sure to do it using the paragraph styling tool and not manually using the tab key, though. (Using the tab key will cause weird shifts to happen, much like using the enter key does.)
To find the paragraph styling tool, go to Format on the top toolbar, as shown below, and click Paragraph.

A pop-up box will appear that looks like this:

There are several things you can change using this pop-up box, including the justification of the text, line spacing, and the space before and after paragraphs, but we’re looking specifically at the indentation. Under the heading Indentation, you’ll want to click on the middle drop-down box labeled Special and click First Line, then OK.

You can see below that there’s a blue arrow non-printing mark to show a paragraph that was indented manually using the tab key, but no non-printing mark when the paragraph styling tool is used to automatically indent a paragraph.

The Takeaways
Formatting your manuscript isn’t something your editor is going to judge you on, but if you follow these steps, they will love you forever.
A couple of the steps might seem a bit complicated at first, since there are a few tools you need to get familiar with, but once you do, I promise your own life will change, too. Find and Replace will save your butt more times than you’ll be able to count. (Just be sure you evaluate each match individually or you might accidentally replace something you didn’t mean to!)
Is your manuscript ready for an editor? Get a free sample edit by clicking the button below!